Showing posts with label Tutorial Barely Needed. Show all posts

Tuesday, July 17, 2012

When Your Favorite T-Shirt Gets Bacon Neck


Transform a favorite t-shirt into a throw pillow.


You can't see it as well in this photo, but this t-shirt has been pulled on by a toddler one too many times and the neck is all wrinkly.

This was one of the original Mercy House Kenya t-shirts and I love what it says, and what Kristen and Terrell have allowed God to do in their lives through opening a maternity home.


So, just grab some sidewalk chalk and a box lid to draw a template (hey, it was within arms reach and it works).  Sew right sides together on three sides. Slide your pillow form in and realize you are a little short. Cut the bottom off the shirt, which is already hemmed (yay!) and add a quick ruffle to extend the length (no pinning, just fold every few inches and shove through your machine).


There you go, your favorite t-shirt is now your favorite pillow.


Saturday, October 22, 2011

Bye Bye Batwing Drawer Pulls


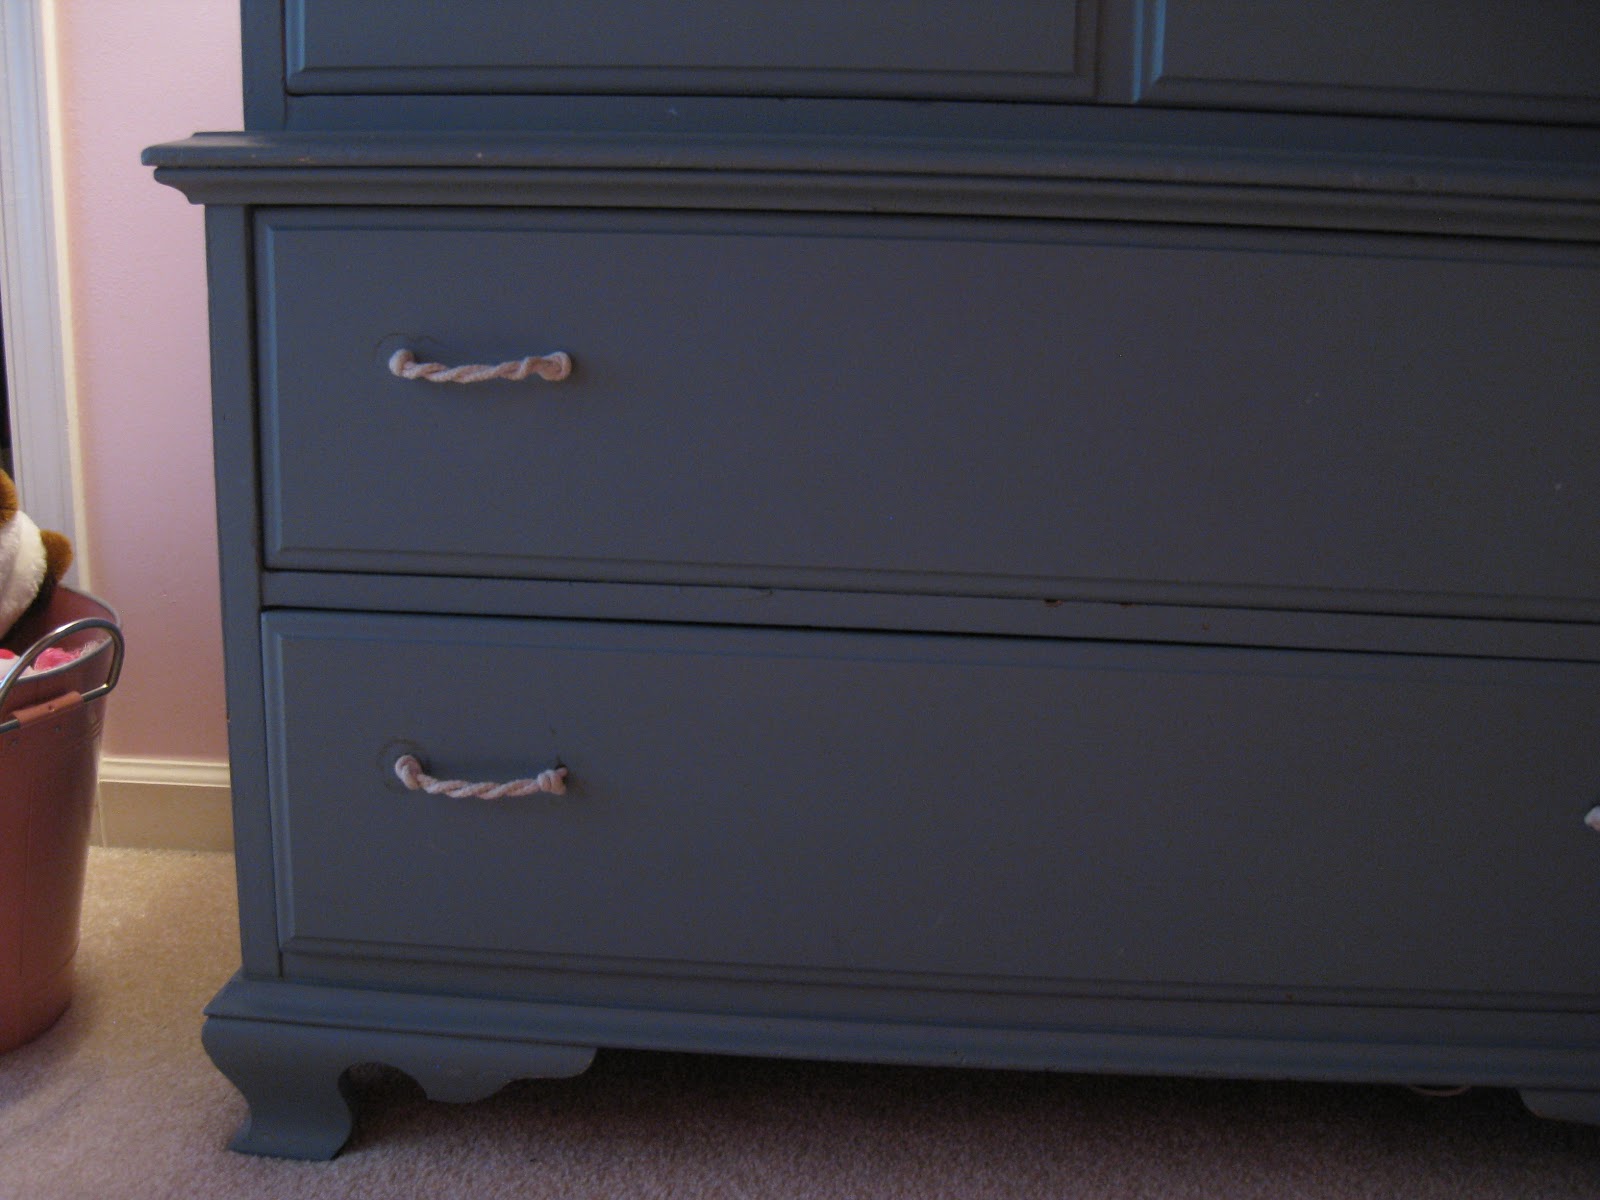
Our kids share an old dresser with the most annoying drawers pulls.  I think Kimba calls them batwings. 
 

They are annoying for a few reasons.  They clank and bang loudly when you open or close the drawers and half of them are falling off. The worst part is there are 5 drawers with 3 different size pulls, making it next to impossible to find matching pulls.


I found some pulls I liked but didn't want to drill new holes to make them all fit.  So I used those on the 2 drawers they fit and I used clothesline on the rest.  That's right, clothesline.


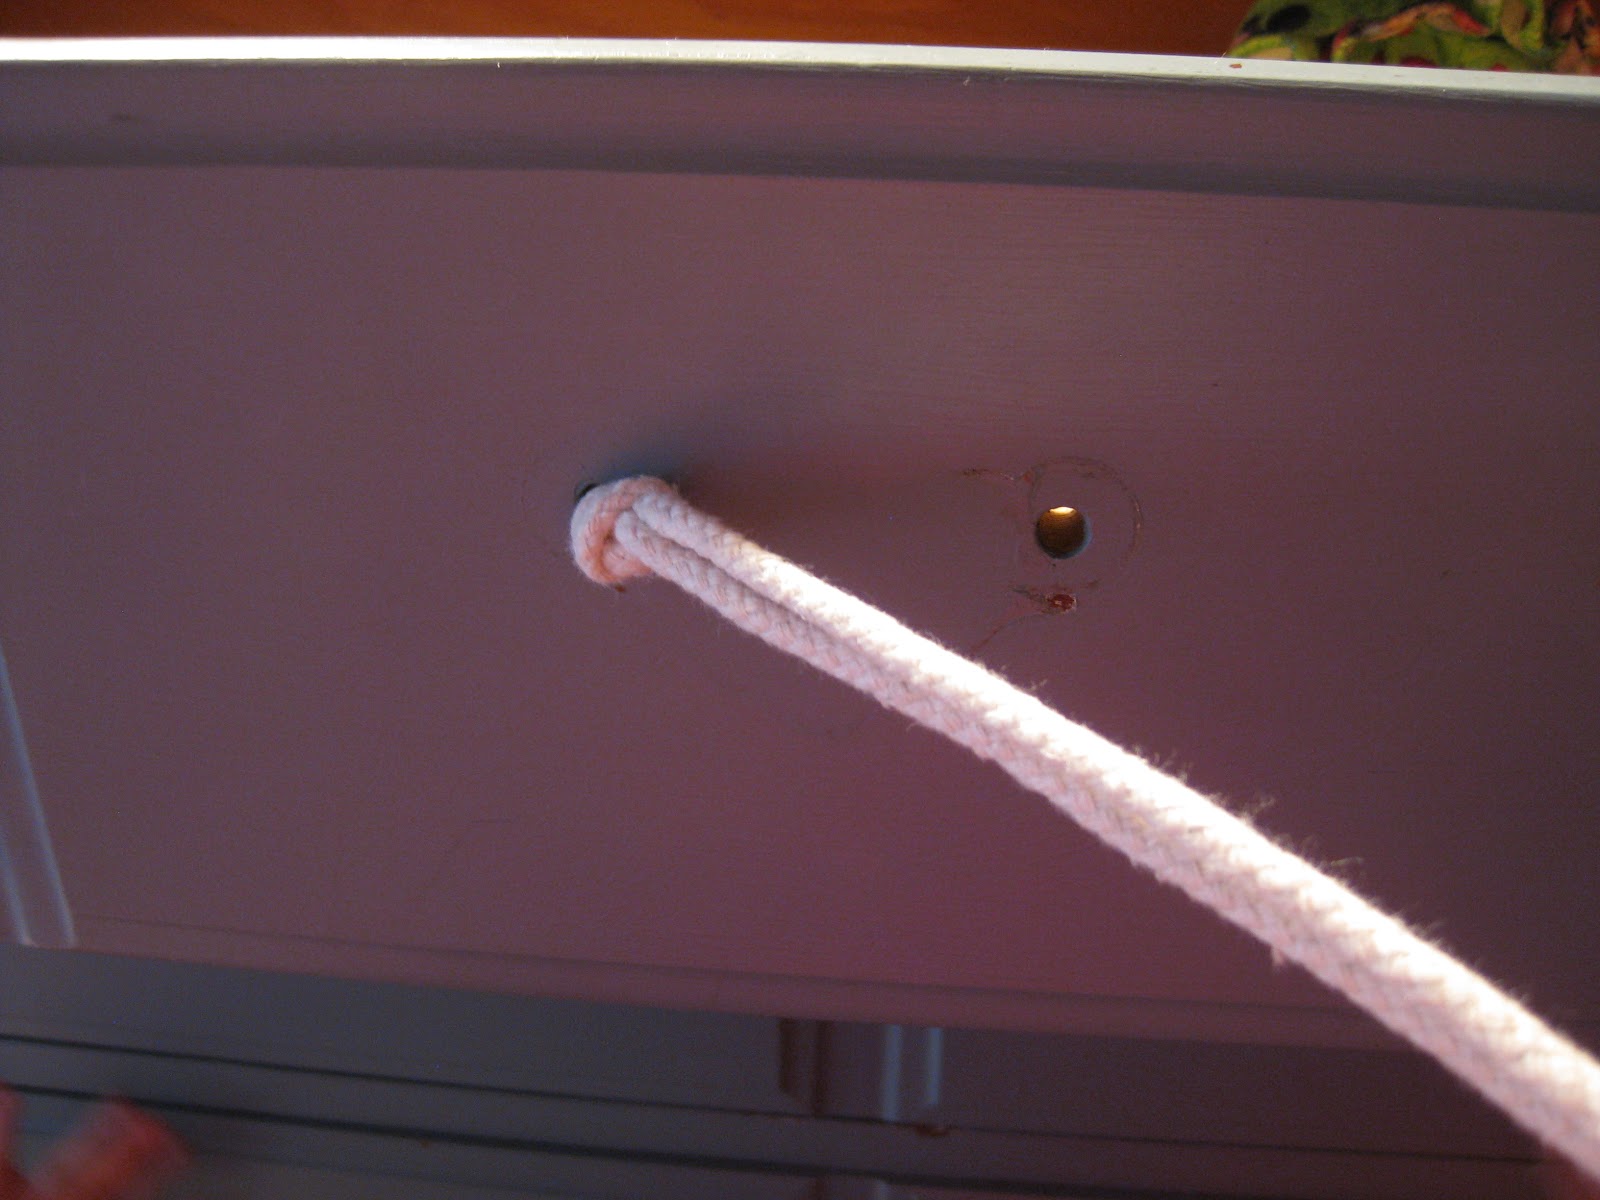
I doubled the clothesline and poked it through the hole with a screwdriver and tied a knot.


Then I twisted the two ends (my husband's suggestion) and I thought that looked better than the untwisted look.
 
 
I tied another knot and fed the clothesline through the other hole and tied the two ends together on the inside of the drawer. Clear as mud?


Before

After  
I would say this took about 30 minutes, and maybe 5 bucks to get rid of the batwings.

Thursday, September 9, 2010

Candy Corn Wreath

A little candy corn, a little glue gun, a little braided jute, a couple of cute supervisors and voila, a candy corn wreath.

Mise en place

As you can see, we were in the middle of a snack when motivation came over me.  I had to strike while the glue gun was hot.


Step 1 of the fall mantel, complete.


I am linking to YOU:create because she motivates me.

Also linking to:


Wednesday, August 25, 2010

Footstool Slipcover


This is another project that, due to my lack of sewing skills, should have NEVER worked.


A few years ago I "reupholstered" a footstool  I found at Home Goods.  I never warmed up to that scary clown monkey fabric and finally decided to give it a new look.  Click here if you want to see the creepy monkey fabric.

So, here we go with the slipcover.  I cut and pinned a piece of fabric to fit the top.  So far, so good.


Next, I cut a bunch of strips to make the pleats.  My friend Pink (I can call her a friend, right?  After all, I met and sewed with her once) gave a great tutorial on making knife pleats.  She said measure twice around and add about a foot.  Well, you should really do that.  I only added about 6 inches and I came up short and had to add another section.  Grrrr. 


I sewed the strips together and hemmed the edges.  I eyeballed it because I am too lazy to pin.


Then I had a piece of coconut cake and caught up on a sweet mom from our church that is fighting pancreatic cancer.  Please pray for Leigh.


There is no getting around pinning and ironing on this part.  Again, I eyeballed it because I am lazy and I enjoy "good enough" sewing.  A real seamstress would probably measure each pleat for precision.


Chloe woke up from her nap at this point, so I got a little help.


I pinned the pleats (right side, to right side) on the footstool.


Next, I attached the pleats.  I was amazed all this fabric fit through my sewing machine.  I was also shocked I didn't break a needle with all those pins.  I removed the ones I could see as I went but I ran right over a few.


And here she is, my little beauty.


...and the rest of the room.

I am linking this to YOU:Create and Works for Me Wednesday, go check 'em out. And don't forget to go to Pink and Polka Dot's Slipcover party!  She taught me everything I ever needed to know about making slipcovers.

Wednesday, July 14, 2010

Make Maternity Pants from Pants

I am the world's laziest and most amateur sewer.  I had one of those wild, pregnancy, nesting, I can do anything moments and I made my own maternity pants out of a pair of pants I already had in my closet.  I mostly wear skirts in the summer and when I'm pregnant but a pair of khaki pants are a good stand by.  I took a million photos to try and show you how I did it.  Click on any of the photos for a closer look.

I put on a pair of pants one size larger than my pre-pregnancy size and while I was wearing them I stood in front of the mirror and drew a line under my belly--yes I wrote on my pants with an ink pen, I didn't have a fancy disappearing ink pen like a real seamstress.  You can see the pen marks in the photo above.


Then I measured my favorite pair of maternity jeans from the top inseam point (i.e. the crotch) to the top of the waist band.  You will use this measurement to see how large to make the panel.  What, huh?  Just keep looking at the photos, it will might all make sense.


 Cut out the zipper as close to the zipper as possible.  


Sew the fly closed.

Have lots of help from cute kiddos and a really messy craft table with hardly any room to work.


Have your husband come and rescue the kiddos when you start to really think through how in the world you are going to get this sewing project to work out.

Cut the extra fabric out just above the pen markings and don't panic...these pants are trash now anyway if this thing doesn't work!

Find a stretchy tank top/camisole you don't wear and use it for the panel.

Turn it upside down, right side out.

Pin and sew starting from the front and working all the way around the back and stop at the front.  Huh?  Just look at the pictures and try to understand how a lazy, amateur sewer makes it all happen.

 Admire the back and how nice it looks.

Now, try and figure out how you are going to get the front to look as nice.


Pinch, fold, contort, pin and shove through your Target sewing machine.

 Admire the front with amazement.

Try on and smile with no make-up and a messy table in the background.


I did it--I made maternity pants out of pants. 

I am linking to Works For Me Wednesday, even though I wasn't completely sure when I started this project that it would work!

Thursday, May 27, 2010

Goodwill Chair Makeover


I saw this chair at Goodwill and it was marked $4.  We always seem to need extra seating and this chair was an easy target for a makeover.  I figured if it didn't work I was only out a few dollars and some spray paint.

Before:
After:

Furry Murray gave it his immediate approval.


The process was simple.  I unscrewed the seat and used Stanleah to attach this chicken fabric I bought a few months ago because I loved it, but had no idea how I would use it.  Then I sprayed the chair with a coat of Kilz primer and 2 coats of Rustoleum Heirloom White.

What are you making today?


LinkWithin

Related Posts Plugin for WordPress, Blogger...